Make Me Static - Working with Domains

Once you have a static copy of your website, to make it easily accessible to users on the Internet you will want to point a domain name at your copy. This is easily done whether using the MakeMeStatic Pages service, however there are a number of third party options that will also work for you.
Pointing a Domain at your MakeMeStatic hosted static copy
This is the recommended approach for beginners and is integrated into the Make Me Static Plugin
Storing your static copy on GitLab
The plugin used the MakeMeStatic GIT service by default, or you can use the GitLab service
Publishing your static copy using GitLab Pages
GitLab provide an integrated Pages platform to which you can point your domain
Publishing your static copy using CloudFlare Pages
Once you have your static site on the GitLab service, you can use it to publish via CloudFlare Pages
Using SSL certificates with your Static site
You will want a "proper" SSL certificate applied to your domain before it goes live, here's how ..
Pointing a Domain as your MakeMeStatic hosted copy
This is the default option and is integrated into the Plugin’s user Interface. In order to allow a domain to be pointed at our service, three things need to happen;
- We need to verify your email address to ensure we can communicate with you if we need to
- You will need to add a TXT record to your domain’s DNS setup to verify that you are the owner and/or controller
- You will need to point a CNAME record for your domain to our pages platform
Once these steps have been completed, our pages platform will respond to requests for your domain name.
To satisfy the first step, within the plugin dashboard you will need to click on the subscription button at the top of the page on the right hand side. This does not commit you to anything, it simply allows you to register an email address against your account and checks that the address works.
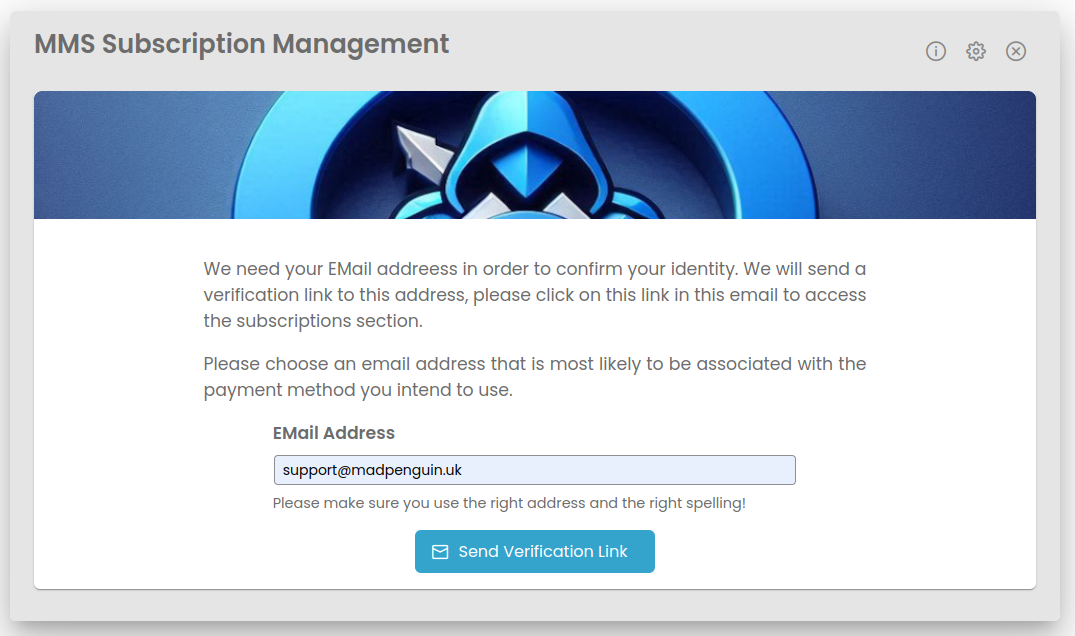
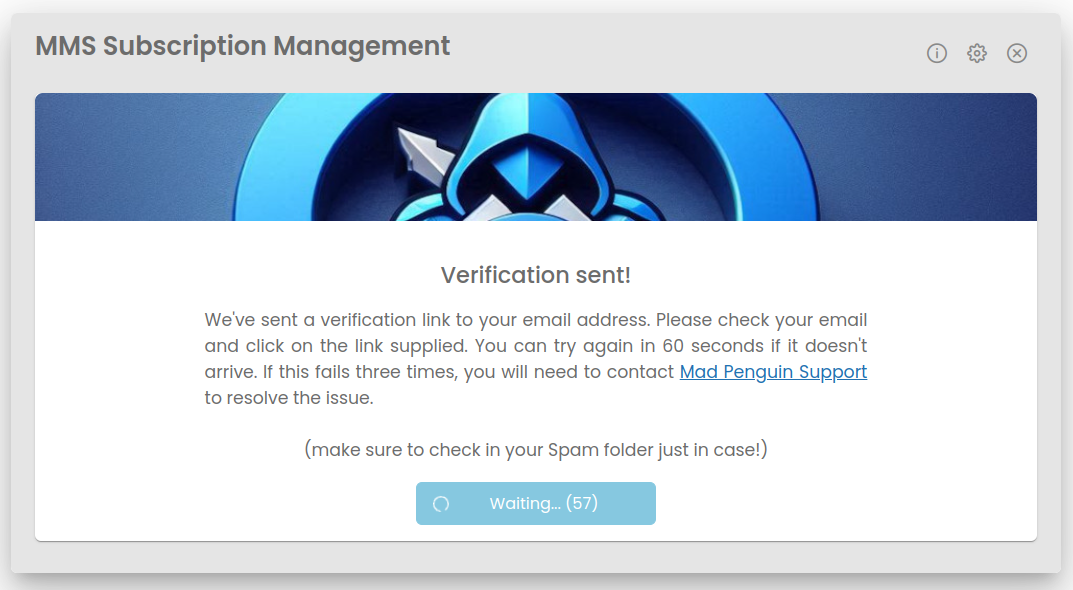
Once you have entered your email address and clicked on Send Verification Link, the system will attempt to send you an email containing a clickable link. If you do not receive this email within 60 seconds, there is a good chance that either the address was mis-spelt, or your email provider has marked it as SPAM and the email is sat in a Spam folder somewhere.
Please give the email chance to arrive and try to find it if it has been delivered. If all else fails, you can try to re-send the registration email up to three times by waiting 60 seconds.
When the email arrive it should look like this, if it does not then please be very careful before you click on anything. It may be we have updated our mail template, or that your mail reader has obscured the graphics.
Once you click on the link it will open a new tab on your WordPress admin page. If you go back to your original tab, you should see the subscription dialog has changed and now looks like this;
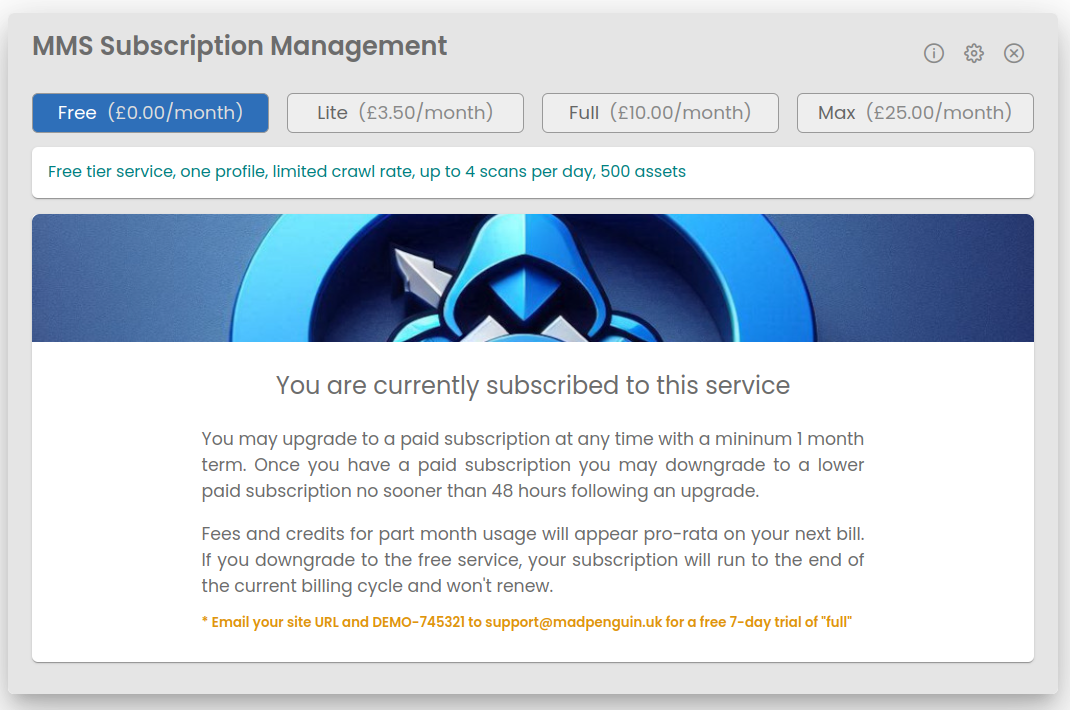
This means that your email address has been verified and you will now be able to point a domain name at your static site. You can close the dialog by clicking on the cross in the top right of the window.
To set up your domain name pointing, click on the Edit Profile button.
This will bring up the profile edit dialog box which should look something like this;
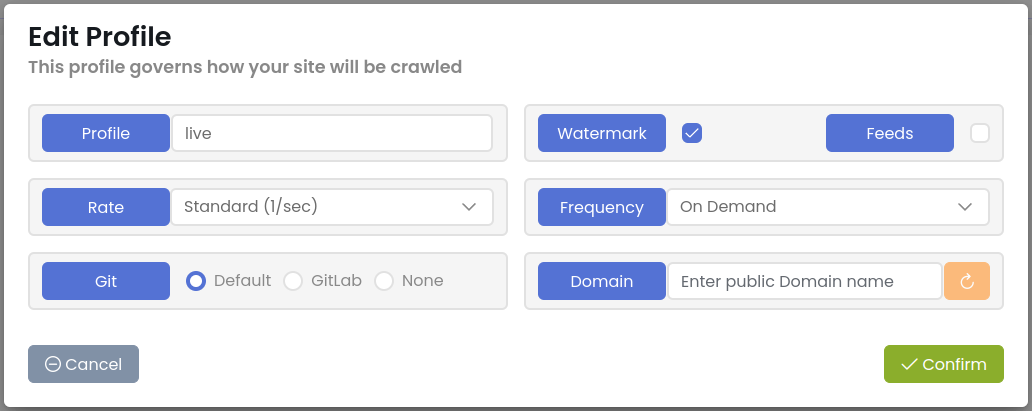
Start by adding your domain name into the field labelled Enter public Domain name , as you do this the Domain button should turn Orange and change to Verify.
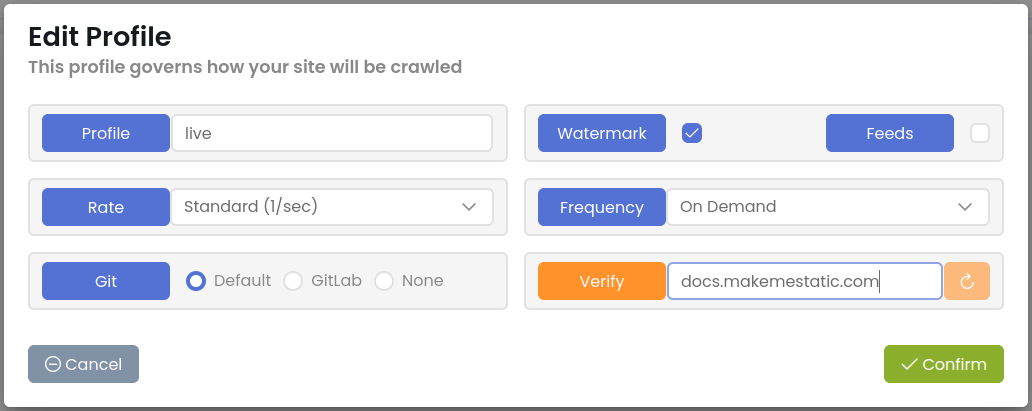
If you click on the verify button, will provide details of how you need to configure your DNS in terms of the TXT and CNAME records you need to add to your DNS setup.
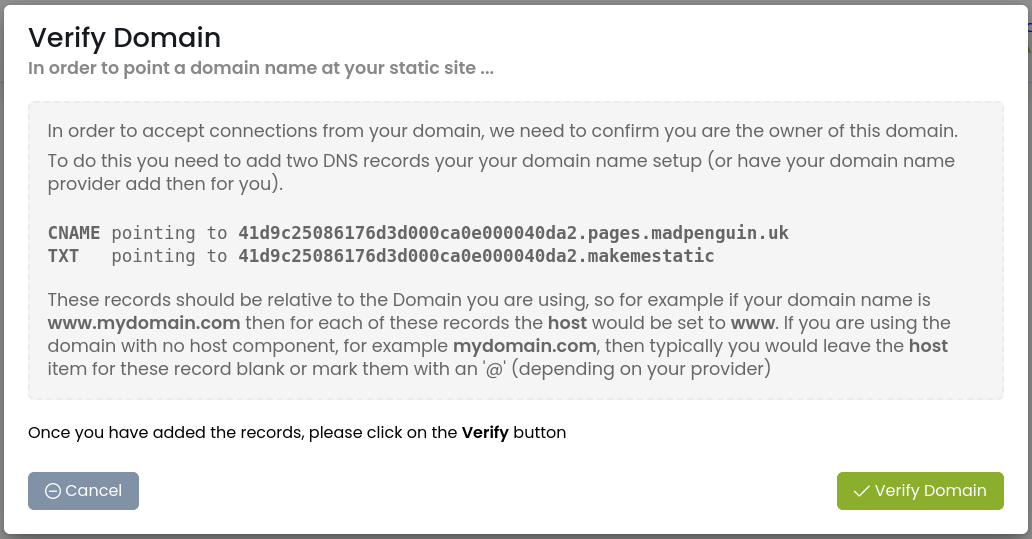
Leave this dialog on the screen while you head over to your DNS provider’s control panel and add in these records against your domain. When you click on the Verify Domain button the system will attempt to read your newly created records to make sure they exist and are correct. Sometimes it can take a little while for DNS updates to become globally available, but typically they will be available immediately.
Clicking Verify Domain will return you to the profile edit dialog. If the system was able to verify your DNS records then the button should be blue and say Domain again, and the icon to the right of the field should be green.
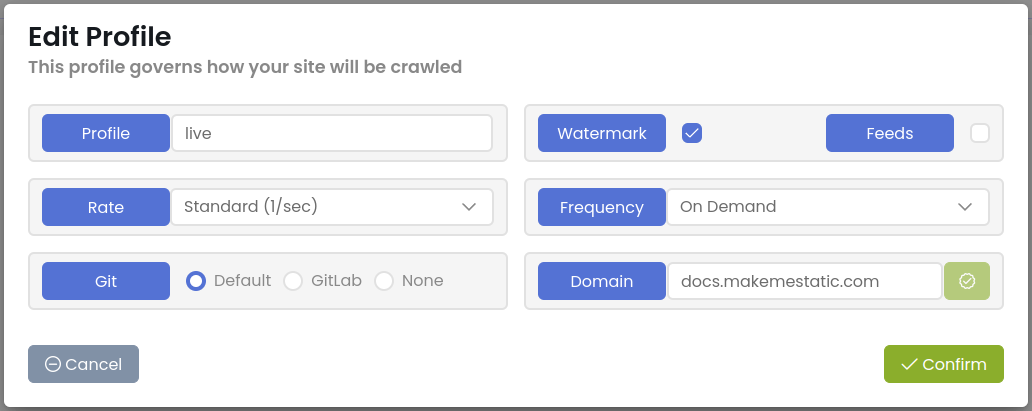
In this instance your domain should now be live. If on the other hand the button remains organge then verification has failed, in which case wait a few moments, click on the orange Verify button again and click Verify Domain again. If this keeps failing, you may wish to check that the changes you’ve made are correct and check your DNS records against other tools.
If this is to be a Live site rather than a test, you may also want to turn off the Watermark, which is another option that becomes available once you have verified your email address.
Click Confirm, your domain name should now be working against this site.
Storing your static copy on GitLab
In order to be able to use this feature you will need a GitLab account. Once you have an account and are logged in, head over to User Settings / Personal Access tokens. Then click on Add new token. You will need to select a name for your token (your choice), an expiry date (your choice) and a scope of operation, which needs to be API.
Note that for security, we recommend using an account that is dedicated to your WordPress site (or sites) to avoid any unexpected issues interfering with other things you may have stored in your Git repository.
Once you have this you will need to create a GitLab project in which to store your static website copy. Once you’ve done this, when viewing your repository your project name is the component of your URL after gitlab.com.
Now you’ve collected the information you need, edit your profile in the plugin dashboard and select GitLab in the Git section.
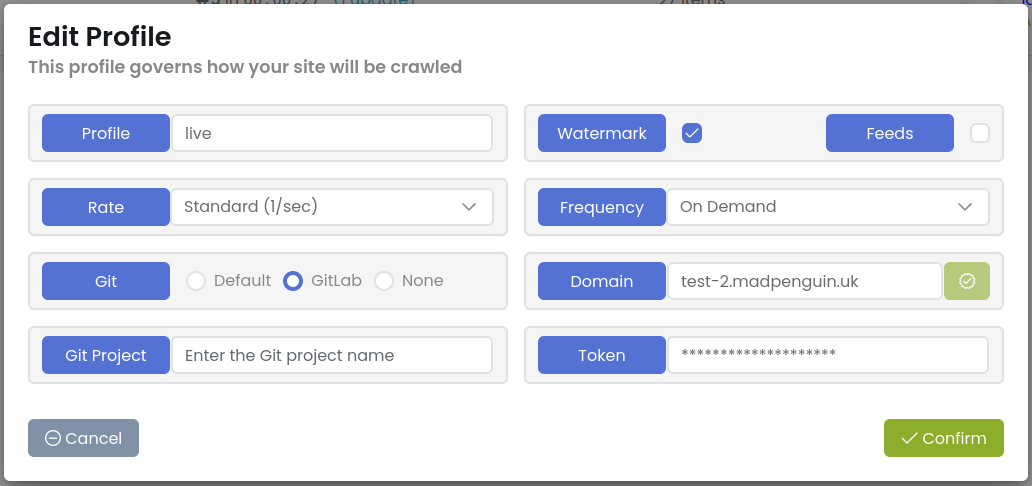
Two new fields will appear that you need to complete with the credentials you’ve just recovered from GitLab.
- The Git Project, which you recovered from the URL of your GitLab project, for example “MyAccount/MyProject“.
- The Token, which is the personal access token you created above.
When you click Confirm, this will make a request using the supplied credentials. If the information provided is not valid, the form will not close. If the form closes, you should be all set and the next scan of your site should be directed to your new Git Account.
Important; if you are CHANGING your Git account, before your next scan click on the Assets Tab in the Make Me Static dashboard, then click on the Menu button (top right) and select Clear All. This will ensure that there are no left over assets in the database from previous scans.
Publishing your static copy using GitLab Pages
Once you have your profile set up to store your static copy in GitLab you can enable the GitLab Pages option. The Plugin will, by default, deploy a GitLab build file into the repository that should cause the Pages deployment to be built. These pages should be Private (by default), so to let other people see them, you will need to change the permissions settings.
In your GitLab control panel, if you visit your project, then visit Settings -> General and expand Visibility. Now scroll down to Pages (it’s not all that easy to spot) you should see it’s set to Project Members only. If you change this to Everyone, then scroll to the bottom and click on Save. The pages should now be visible to the World.
To check this, click on Deploy in your GitLab control panel (down the left hand side of the screen) and then Pages. Near the top of this page you should see Deployments and listed, a URL to your GitLab pages hosted static copy. (click on it to view your static copy)
If you wish to point your domain name at this GitLab hosted static copy, click on the New Domain button hiding down in the bottom right of the page. The process is not unlike that used to point a domain to the MakeMeStatic pages hosting, you essentially need to point a TXT record and CNAME at GitLab.
Publishing your static copy using CloudFlare Pages
To use this feature, storing your static copy on GitLab is still a pre-requisite. This is simply because the CloudFlare Pages platform currently only supports GitLab and GitHub SaaS solutions and the MakeMeStatic platform doesn’t currently have direct wrangler support. (we may add this in the future)
Question: once we have our static copy on GitLab, and GitLab pages is fairly automatic, why do we need to then deploy it on CloudFlare pages, surely this does the same thing as GitLab pages?
Answer: you don’t have to, it’s an option. If you compare the performance of GitLab pages to CloudFlare Pages, you might find you’re happy with the GitLab Pages performance, or you might find that CloudFlare offers preferrable features and performance, your choice. If you don’t know the difference, then you might be better off just using the MakeMeStatic pages solution, which is arguably much quicker when it comes to deployments.
Deploying to CloudFlare Pages
- Log into your CloudFlare account and select Wordkers and Pages from the main menu (left of screen)
- Click Create
- Select the Pages tab
- Click on Connect to Git
- Follow the instructions …
- Use default (generally empty) values for all fields, the exception being the Root Directory, where you need to set the path to public
Once you have a deployed static copy, then like GitLab Pages it will provide you with a unique URL on which you should be able to see your static copy. If you click into the profile for your new CloudFlare Pages instance, click on the Custom Domains tab, this will allow you to point your domain at this new static copy.
Question: do I need to have my domain hosted with CloudFlare to use CloudFlare Pages.
Answer: as far as we are aware, yes!
PLEASE READ / BEWARE if you are going to use CloudFlare Pages.
CloudFlare provide an excellent ‘static pages’ option with their Free Tier service, however there is one specific feature you should be aware of and disable when using it with MakeMeStatic.
In addition to automatically publishing a new version of your static site whenever a commit is made to your main Git branch, by default it also generates previews for “other” branches. Now the crawler creates a new branch for every crawl, and breaks the crawl down into lots of small commits. By default CloudFlare (at the time of writing) will automatically deploy a new version of your static site on each branch commit, so sometimes you can get dozens of new CloudFlare deployments per crawl. Now these deployments are limited per month, so if you’re not careful you could run out of your monthly allocation within days (or even hours).
If in doubt, check the documentation, ask us questions, or even better, use our support service to get all the leg-work done for you.
Using SSL Certificates with your Static site
You will almost certainly want (or need) to have a real SSL certificate applied to your static copy if you intend on it being used by anyone else. Without such a certificate, users will be told the site is insecure and warned off using it. Whereas you can apply to your Pages Hosting provider to register and apply an SSL certificate to your site (which tends to have a not insignificant subscription attached) there are a number of solutions available that will allow you to accomplish this without having to pay.
The approach we usually recommend for getting started is to use CloudFlare for your Domain hosting. In addition to being one of the cheapest (the cheapest?) Domain hoster, they provide a reverse proxy service that includes the automatic provisioning of SSL certificates.
What does this mean? Essentially, if you register (or transfer) your domain with them, then point your domain at a Pages platform (whether it be theirs, GitLab or MakeMeStatic) the default option is to direct all traffic through their servers while applying an SSL certificate to your domain.
So assuming this solution, once you have a static copy of your site on a Pages Platform, visit the DNS section on your CloudFlare control panel, from there you can add the TXT and CNAME record as directed by your Pages Platform. By default the proxy option should be enabled. Once this is complete you should be able to access your site, via your domain name, and it should show with a verified SSL certificate and not complain it’s insecure.
Note: there are a number of other very beneficial reasons why you might want to use CloudFlare as a reverse proxy in front of your static site. Take a look at CloudFlare’s literature for details, but in particular, bu default they provide DDOS protection and caching.
